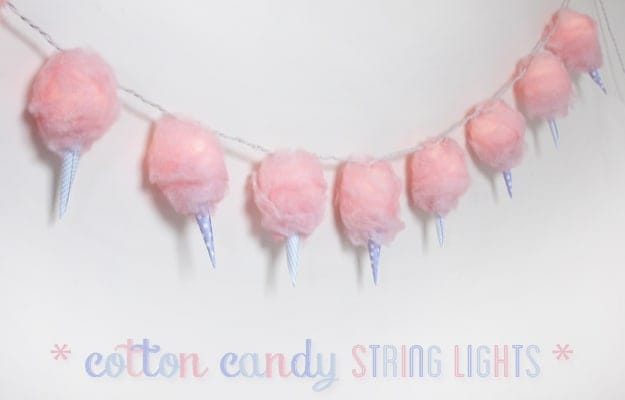
DIY COTTON CANDY PARTY LIGHTS
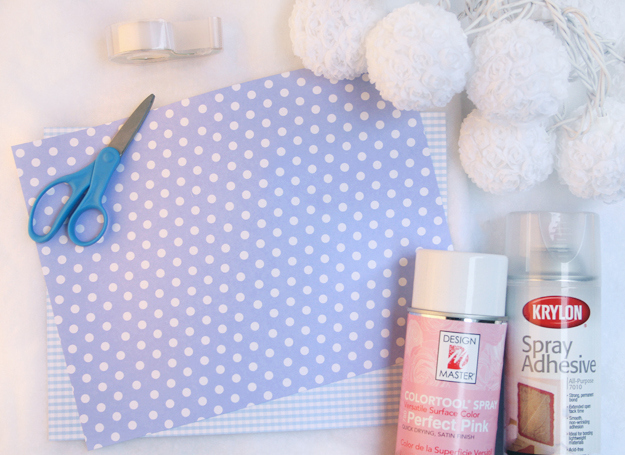
This whimsical DIY project is perfect for a cookout or party! You will need: cotton batting, light pink spray paint, spray glue, decorative paper, scissors, double-stick tape, and lantern string lights. These warm white lights are perfect to use in this project.
- Cut the cotton batting into 2 by 4 inch strips, and then spray paint each side of all of the strips.
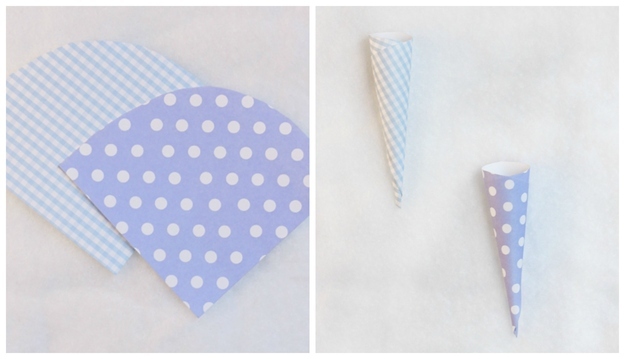
- Cut the paper into rounded triangles, almost like a fan shape. Roll the paper into a cone and place double-stick tape to secure it.
- Spray the top of a cone and place a light bulb onto it. Repeat this step until each light bulb has a cone attached to it.
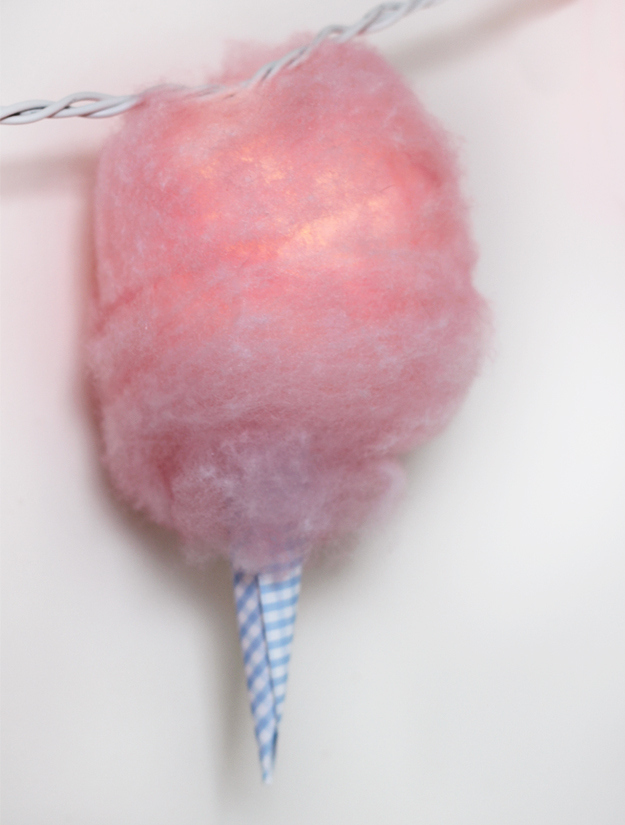
- Finally, spray the lanterns with glue, and then wrap cotton around the lanterns.
This whimsical take on a childhood favorite was created by Kia from With Lovely.
The materials: cotton batting, lantern string lights (white or pink), light pink spray paint, spray glue, decorative paper, scissors, and double-stick tape.
Separate the cotton batting into strands until it’s wispy. I cut mine into 2-by-4 inch strips, separated them so they each became two strips that were half as thick, and then pulled the cotton apart until it was about three times the original length.
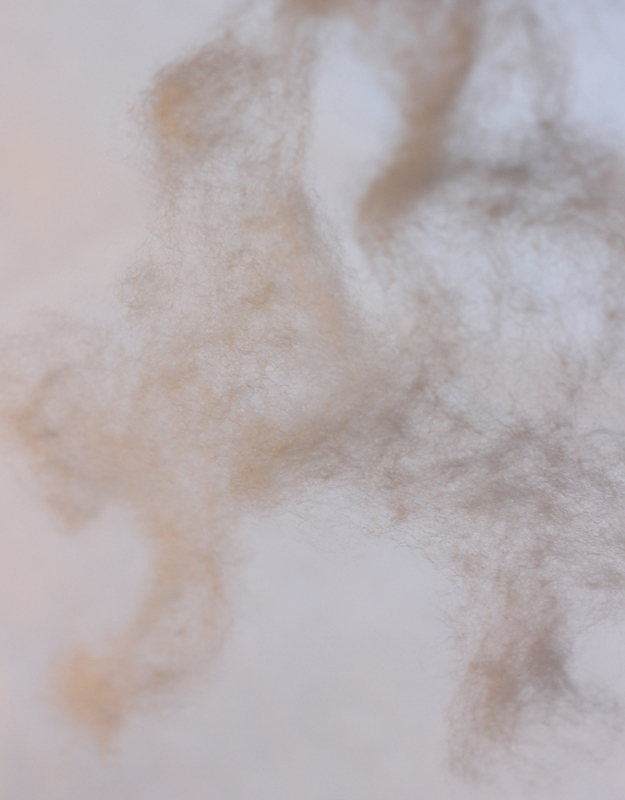
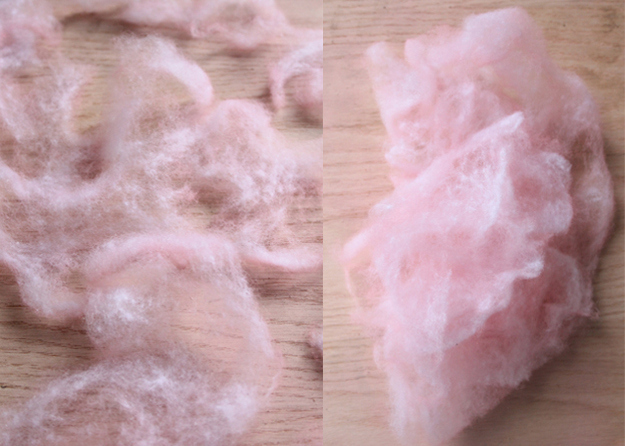
Paint the cotton batting with a layer of spray paint on each side. Don’t worry about the color being even — a bit of variation will actually make it look more realistic.
Make the paper cones. Cut the paper into rounded triangles about 4 inches long (you should have one triangle for each lantern), roll the paper into a cone, and secure with double-stick tape.
Attach the paper cones to the lanterns. Spray the top of each cone with glue and place it on the bottom of a paper lantern, holding for at least one minute or until set.
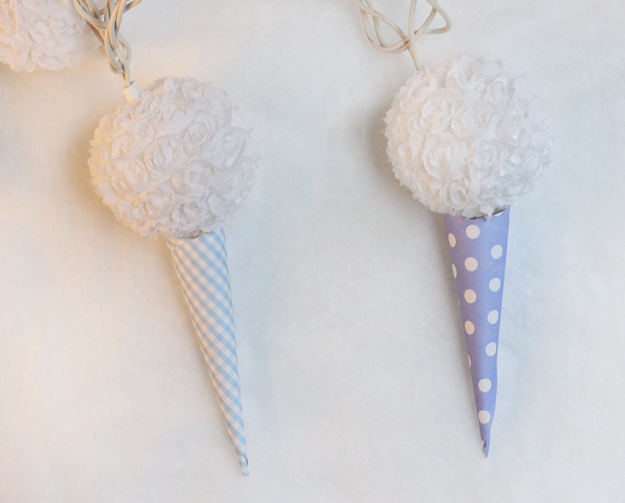
Add the cotton candy. Spray each lantern with spray glue, then wrap strands of colored batting around the lantern and the top of the paper cone until you’re happy with the shape and size. Repeat until all lanterns are complete.
And there you have it — deliciously adorable decor that’s perfect for an outdoor fete.